Installing WordPress From Your cPanel Using Softaculous
In this tutorial you’ll learn how to install WordPress quickly and easily in just a few steps from your cPanel using Softaculous.
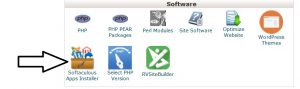
First of all, you should login to your cPanel and locate the Softaculous Apps Installer under the Software section, click on this…..
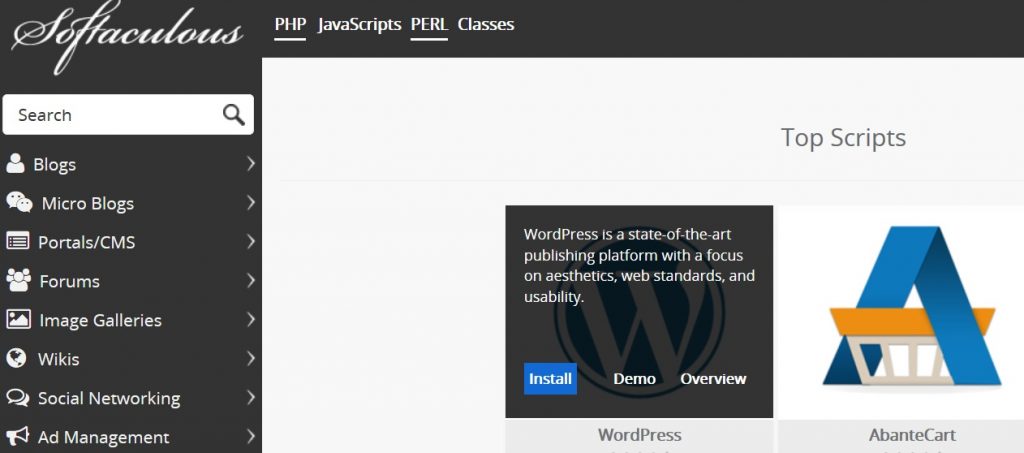
Hover your mouse over the WordPress icon in Softaculous and click Install
Now lets deal with the first three boxes as shown in the image below
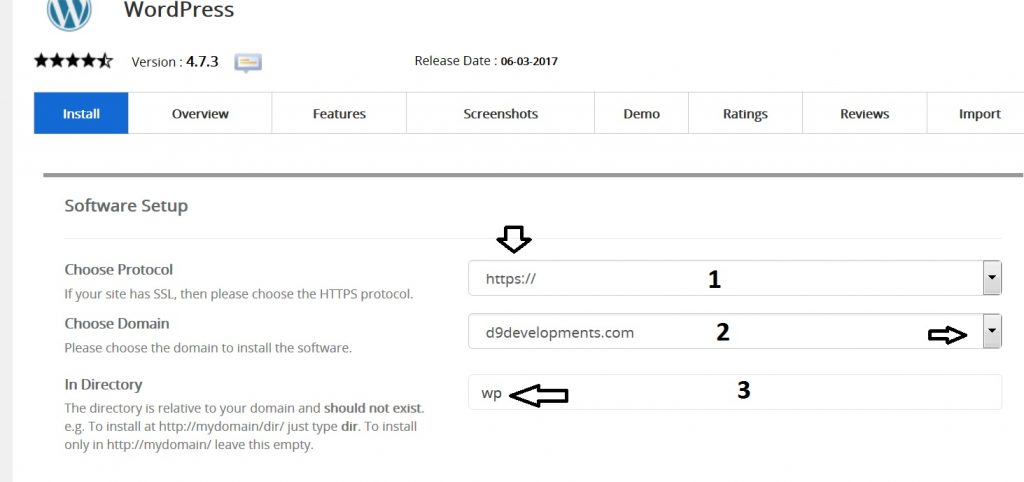
1. Choose Protocol
You should really ensure that https:// is selected on the dropdown menu. Google now demands that all websites have an SSL Certificate installed, otherwise they will mark your website as `unsafe’ (for more informaton on this, check it out here
https://d9.hosting/free-comodo-ssl-certificates.php
With D9 Hosting, all our Clients have free SSL Certificates automatically installed, so you you should leave the first box as https:// and your site will be seen as `safe for visitors’ by Google
2. Choose Domain
If you only have one domain on your account, then this should automatically be in this second box. If you are installing on an addon domain, then click the drop down menu and select your domain
3. In Directory
Do not leave this as wp otherwise your blog will have to be reached thus https://yourdomain.com/wp
If you want the blog installed directly on https://yourdomain.com then delete the wp from this third box and leave this box empty
If you wish to install your blog in a folder called, for example, `blog’ and you want your site to be reached thus https://yourdomain.com/blog then type the word blog in this third box, or whatever folder you want your blog to be installed in
Now let’s deal with the second two sections shown in the image below
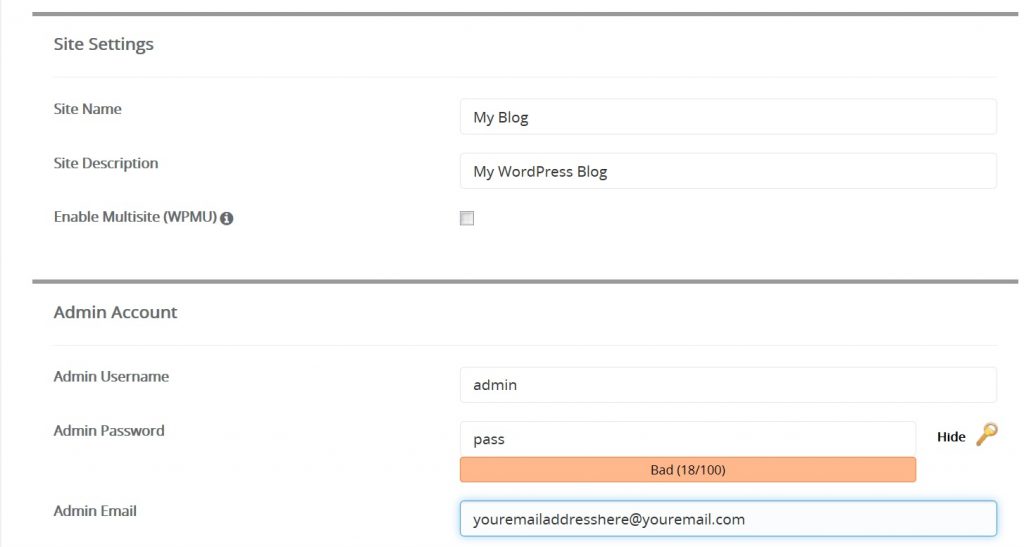
4. Site Name
Insert here the name of your site. This will appear in the header at the top of your blog e.g. Joe Bloggs Cool Blog
5. Site Description
Again, you get to choose here how you describe your blog, or you can leave this blank if you wish
Admin Account
6. Admin Username
Please DO NOT leave this as `admin’. Nearly everyone does and it’s a gift to hackers. Ensure you use a combination of upper and lower case letters, numerals and special characters e.g. ! & % * Make sure you write this username down NOW and keep it somewhere safe!
7. Admin Password
Again, choose a secure password with combinations of letters (upper and lower case), numerals and special characters. Write this down NOW and store it somewhere safe
8. Insert here an email address that you have access to, DON’T use the one that WordPress have automatically inserted as it likely doesn’t exist — they just insert one as an example. Don’t use an email address you haven’t created in your cPanel yet, if this is a new domain. You can easily change to another email address once wordpress is installed from the dashboard.
This is also the email address used to resend your login details to if you ever forget them or misplace them.
9. The next section is pretty self explanatory, simply choose your preferred language, or leave English as default
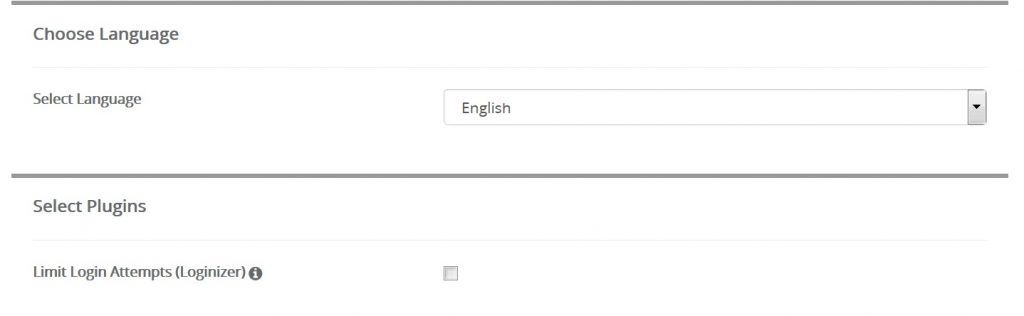
10. In this section you can limit login attempts to your blog. This is particularly good for deterring bots that are trawling the web attempting to login to blogs with easy usernames and passwords.
Activating this means that they won’t be able to bombard your blog with millions of different username/password combinations, they will only get a couple of attempts before they’re limited.
It will also mean, though, that if you’re trying to get in and you use the wrong login details more than a couple of times, you will be limited too for a period of time. That’s why it’s important to ensure you store your login details in a safe place.
11. The next section is the Advanced Options settings. By default, you will need to click on the + sign as shown in the picture below, to expand these options

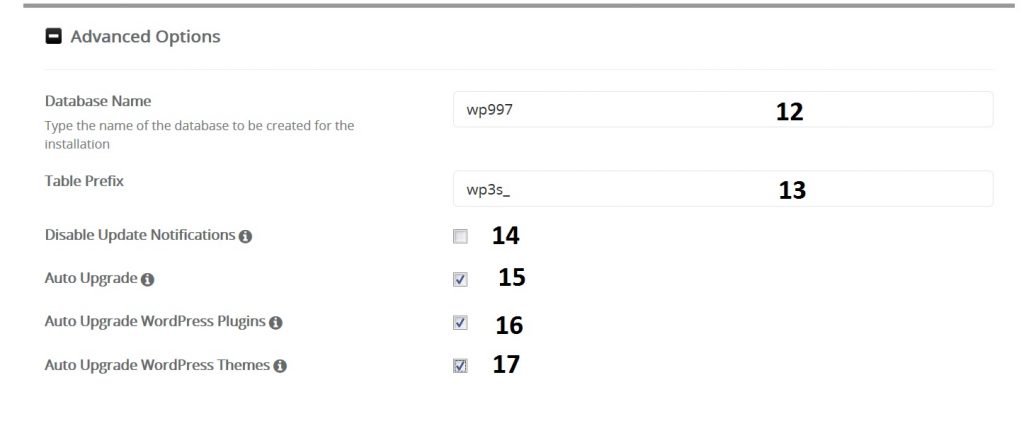
12 and 13 Database Name and Table Prefix
These two boxes can be left as they are
14. Disable Notifications
If you check this box, you won’t be notified by email when there are wordpress updates. It’s important that you ARE notified as you must ALWAYS keep your wordpress installation up-to-date with the latest versions as they’re released. They contain very important security updates and patches. Not keeping your installation up-to-date means you’re making yourself extremely vulnerable to hackers.
15. Auto Upgrade
Some people like to do their updates themselves, which is fine if you, say, only have one blog to update. However, this is a very handy fuction that automatically updates your blog with the latest version of WordPress as soon as it’s released
16. It’s also vitally important to keep your plugins up to date, this feature does what it says on the tin….. automatically updates your plugins for the latest versions when they are released
17. Same for your themes, if you’ve purchased a theme from a reputable developer or used a free theme from wordpress, they will be updated fairly regularly, so you must ensure you have the latest version
For more information about other things you can do to ensure your website is secure, please check these articles out
https://d9clients.com/knowledgebase/36/Wordpress
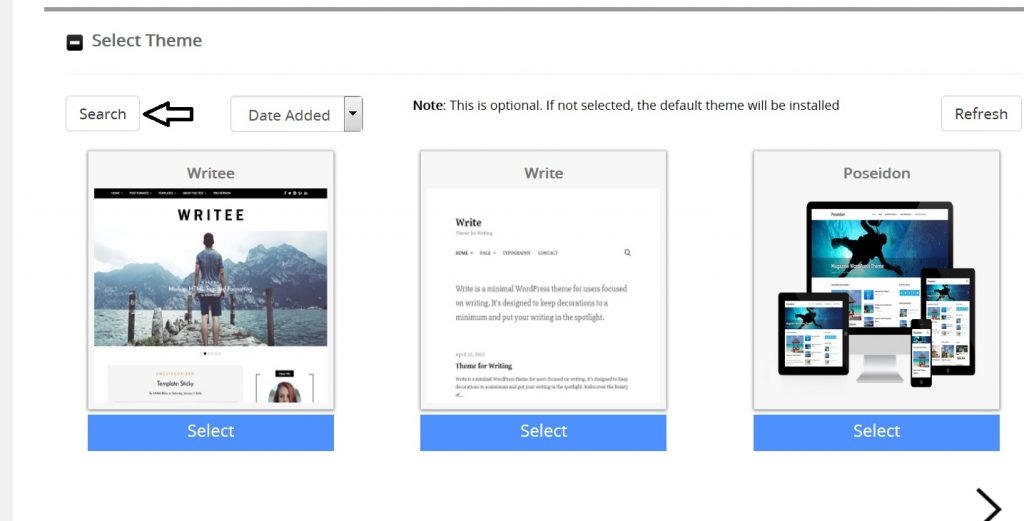
18. Select a Theme
You can choose a theme by either selecting one of the three shown, or click on the search button and a myriad of themes, all approved by wordpress, will be listed for you to check out the demo and install
19. DON’T FORGET to insert your email address in the box shown, BEFORE you click Install. Your login details will be emailed to you, so you have them in duplicate — you copied them down earlier when you created them, and you should also receive an email with them.
20. There we have it, your own wordpress blog in just a few quick clicks. You can now access your blog’s dashboard at
https://yourdomain.com/wp-admin